Prepare your USB
Download the official amd64 ISO and verify its SHA256 using the Download page when the public download is available. Write the ISO to a USB using a trusted image-writing application. Writing the image erases the USB, so select it carefully.
The screenshots are examples from a test installation. Your hardware details and available options may differ. Select any screenshot to open it at full size.
1. Boot the USB
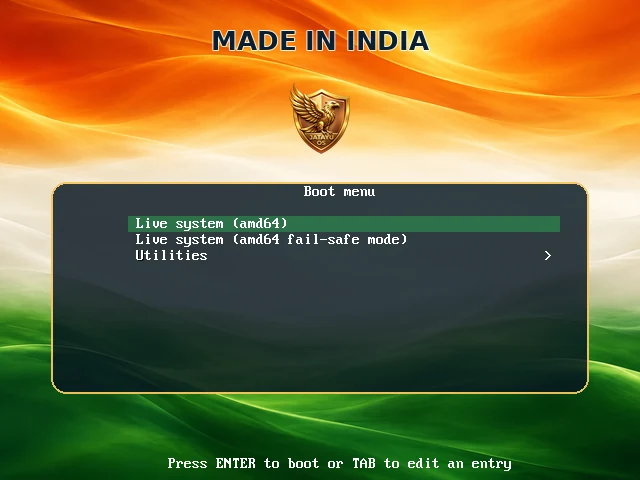
Open your computer’s boot menu and select the USB drive. At the JatayuOS menu, select Live system (amd64) and press Enter. The fail-safe entry is an alternative if the normal entry has display or startup problems.
2. Try the live desktop
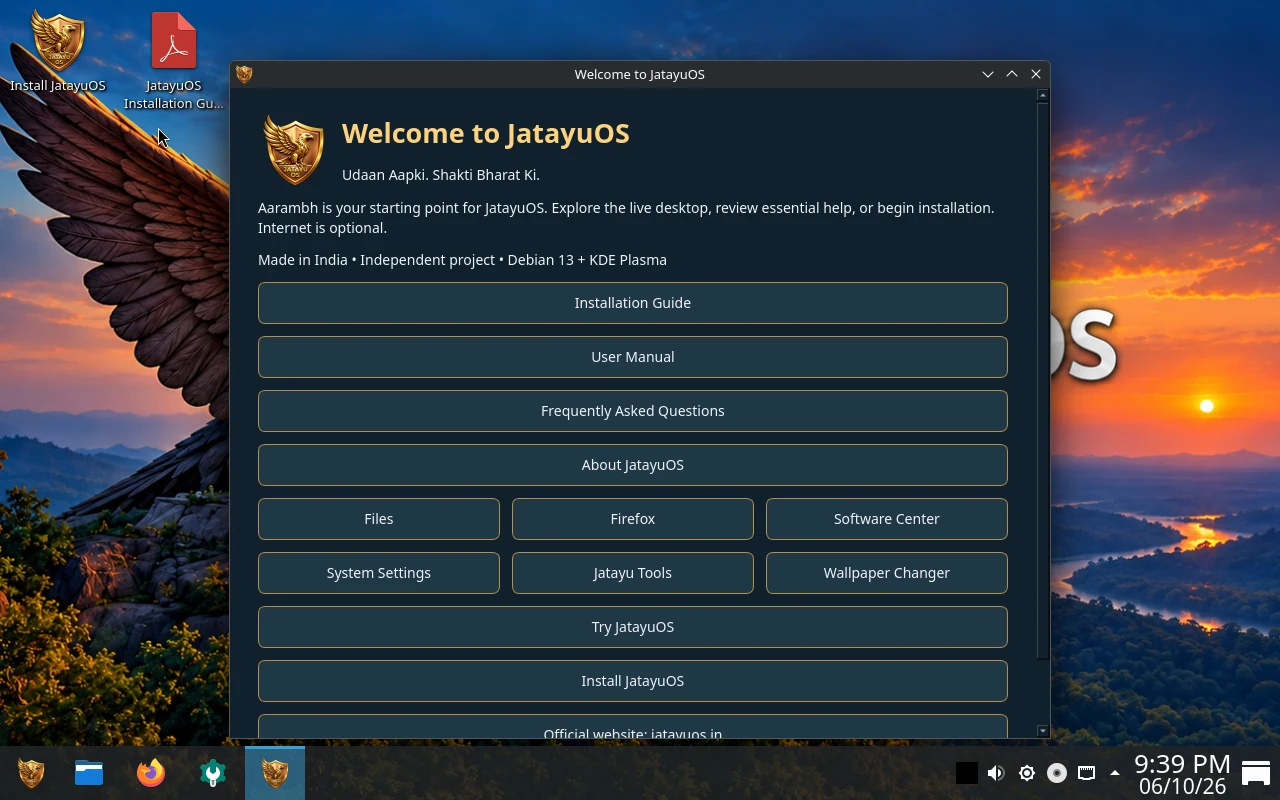
Aarambh opens on the live desktop. Check your display, keyboard, touchpad, sound and network before installing. If asked to sign in, use username jatayuos and password live. Choose Install JatayuOS in Aarambh or open the desktop shortcut. No internet connection is required for installation.
3. Start the installer
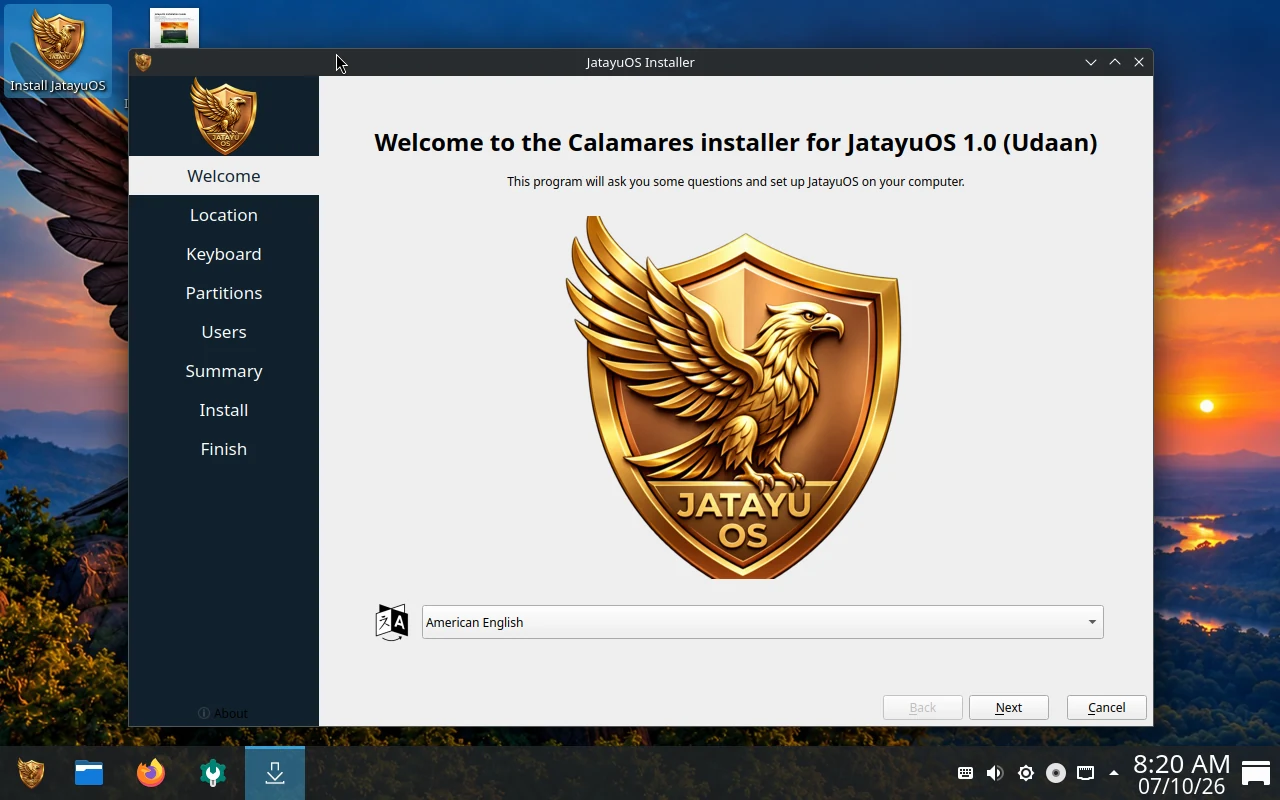
On the Calamares welcome screen, choose the installer language you prefer and click Next.
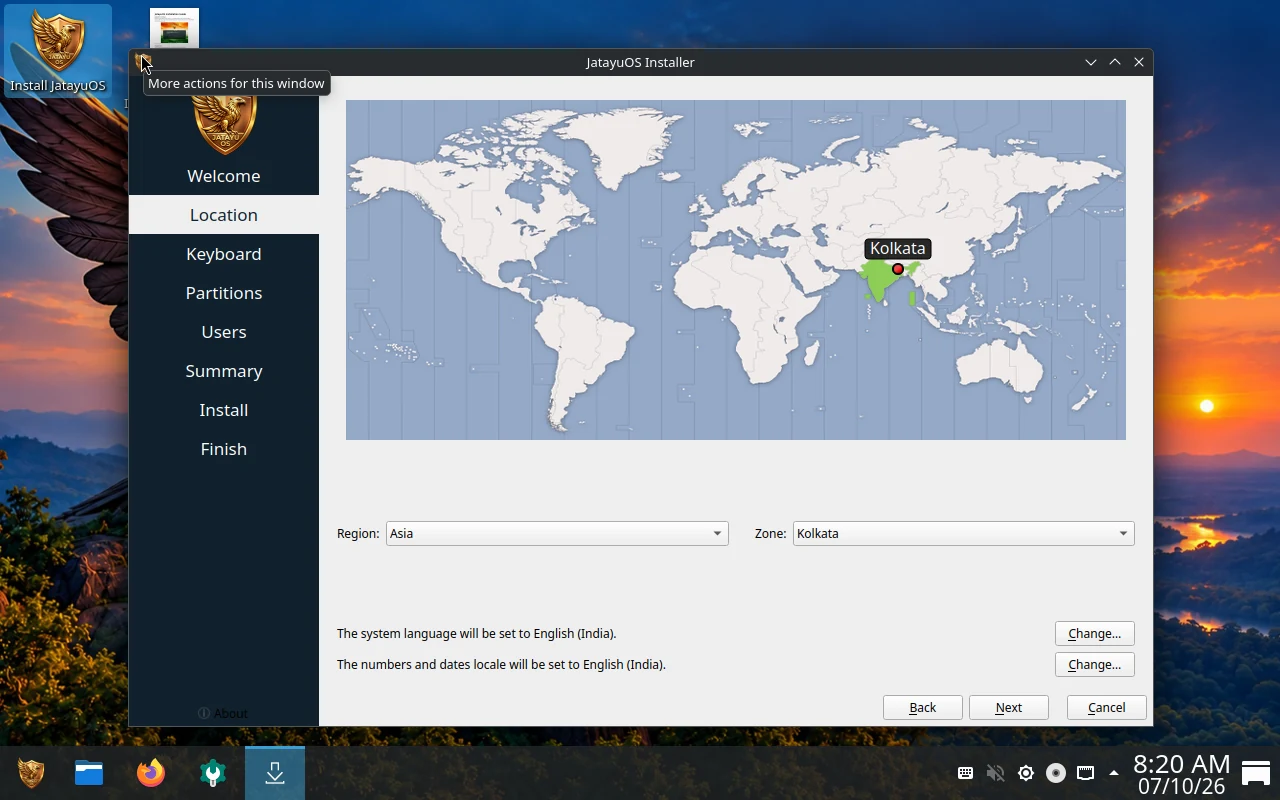
4. Choose your location
Select your region and time zone. For India, choose Asia → Kolkata. Check the system language and number/date formats shown below the map, then click Next.
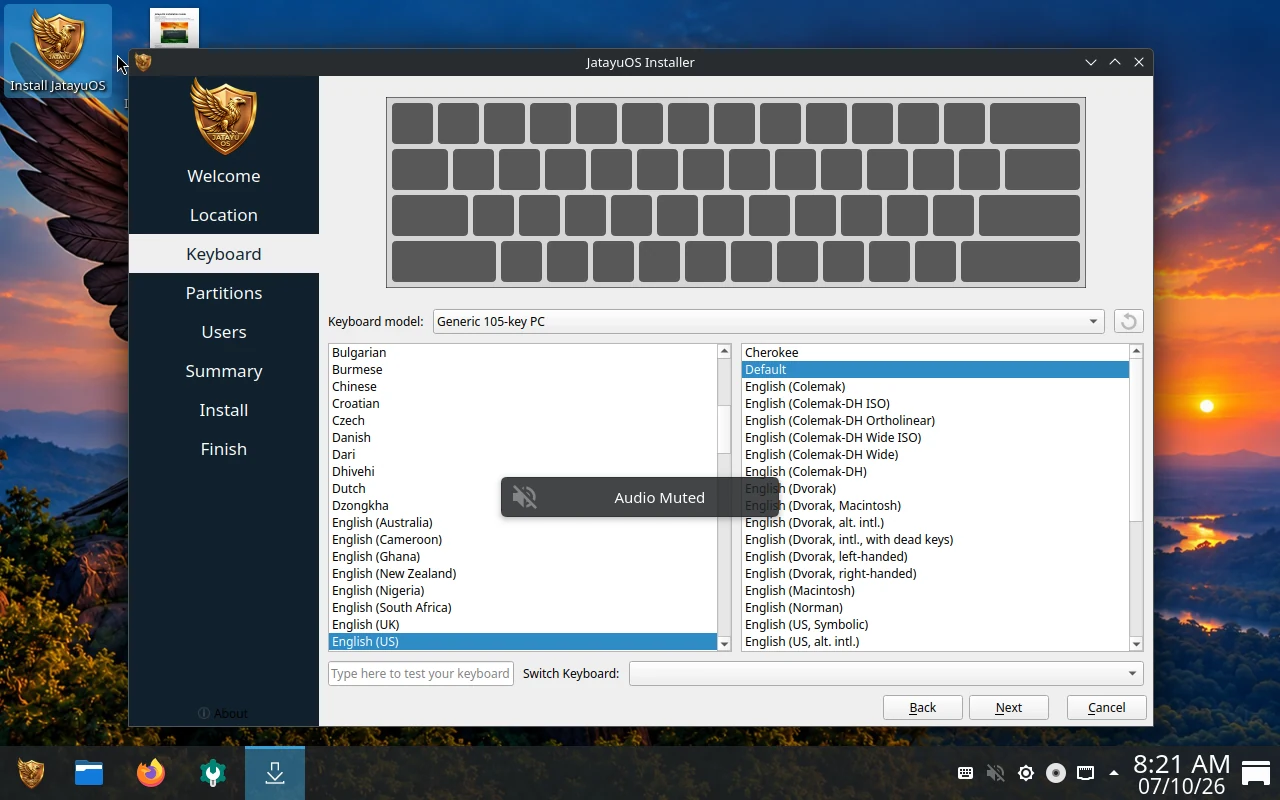
5. Choose and test your keyboard
Choose the layout that matches your keyboard. The screenshot uses English (US), Default. Type in the test box to check letters and symbols, then click Next.
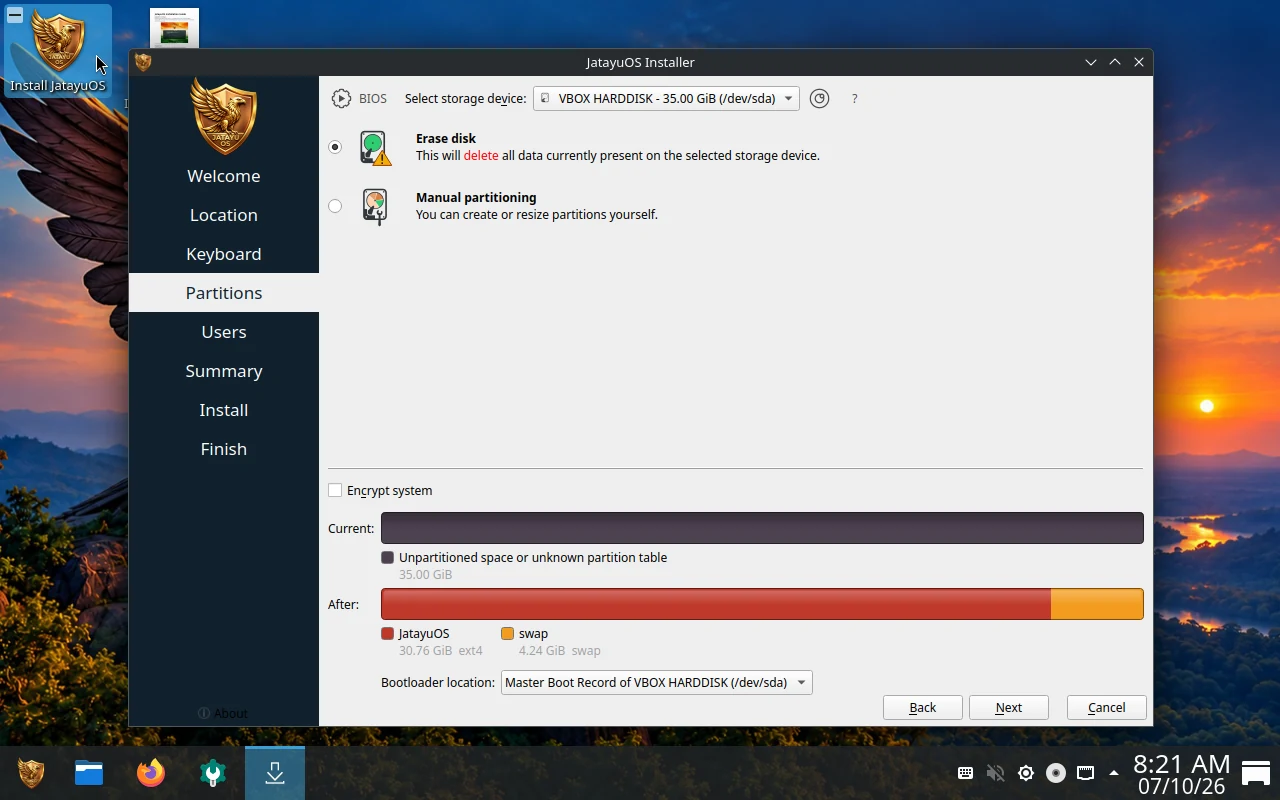
6. Choose the installation disk
Check the storage device’s name and capacity before selecting it. Erase disk deletes all files and operating systems on that disk. Use it only for a clean installation on a disk you intend to wipe. Manual partitioning requires a separate plan for existing partitions. If keeping Windows or another OS, stop here and get help with that layout; this guide demonstrates a clean installation only.
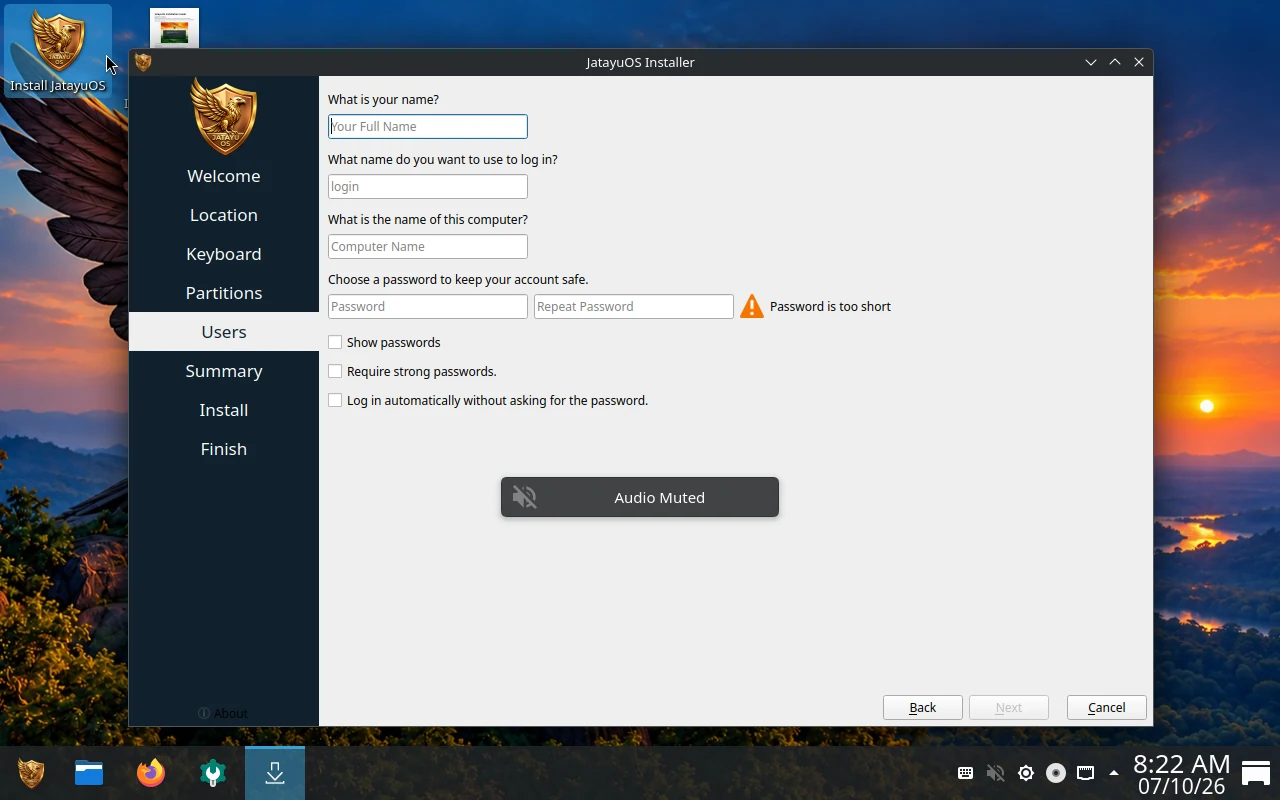
7. Create your account
Enter your name, login name and computer name. Choose a password and repeat it. Use a strong password; leave automatic login unchecked if you want a password at sign-in. These are your installed-system credentials, separate from the live-session login. Click Next when the form is complete.
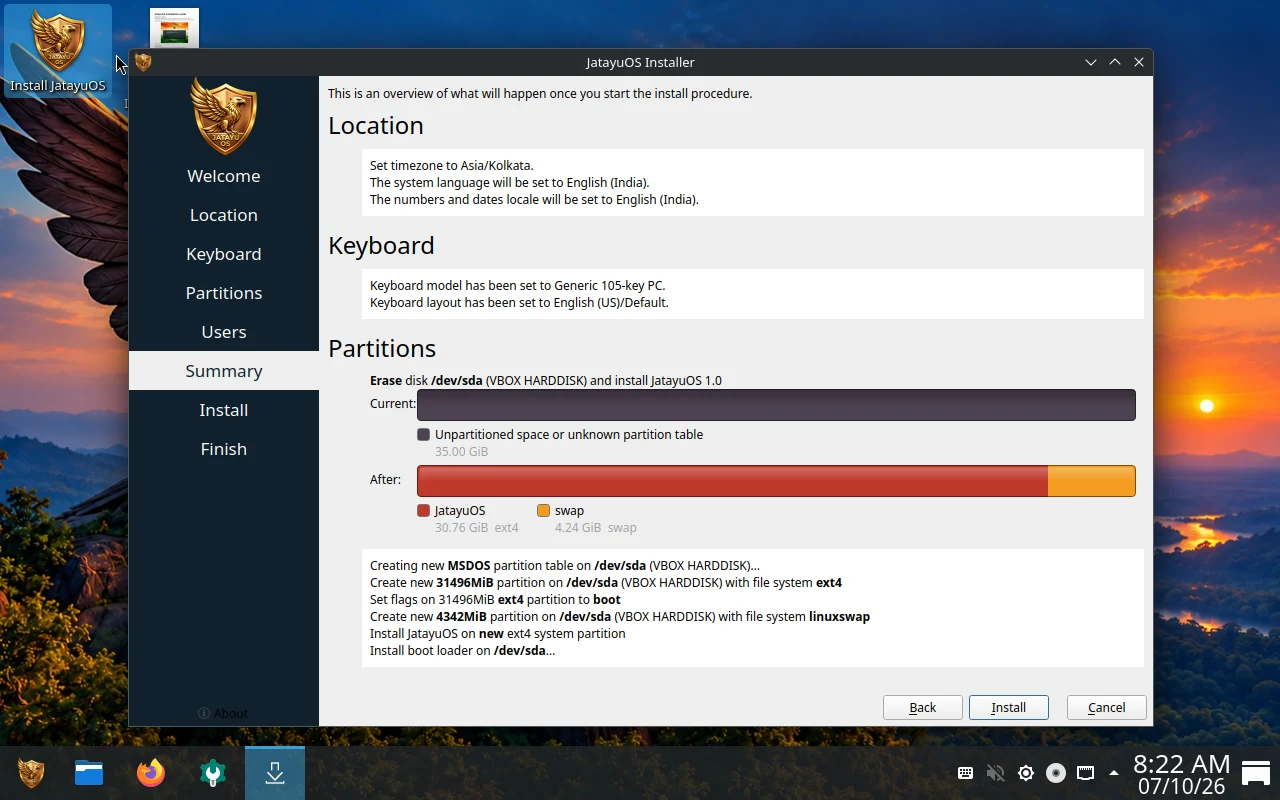
8. Review every change
Read the location, keyboard and partition summary. Confirm the correct disk is selected and that every proposed deletion is intentional. Use Back to correct anything. The screenshot shows an example 35 GiB virtual disk in BIOS mode; your capacity, disk name, partitions and bootloader details can differ.
9. Confirm installation
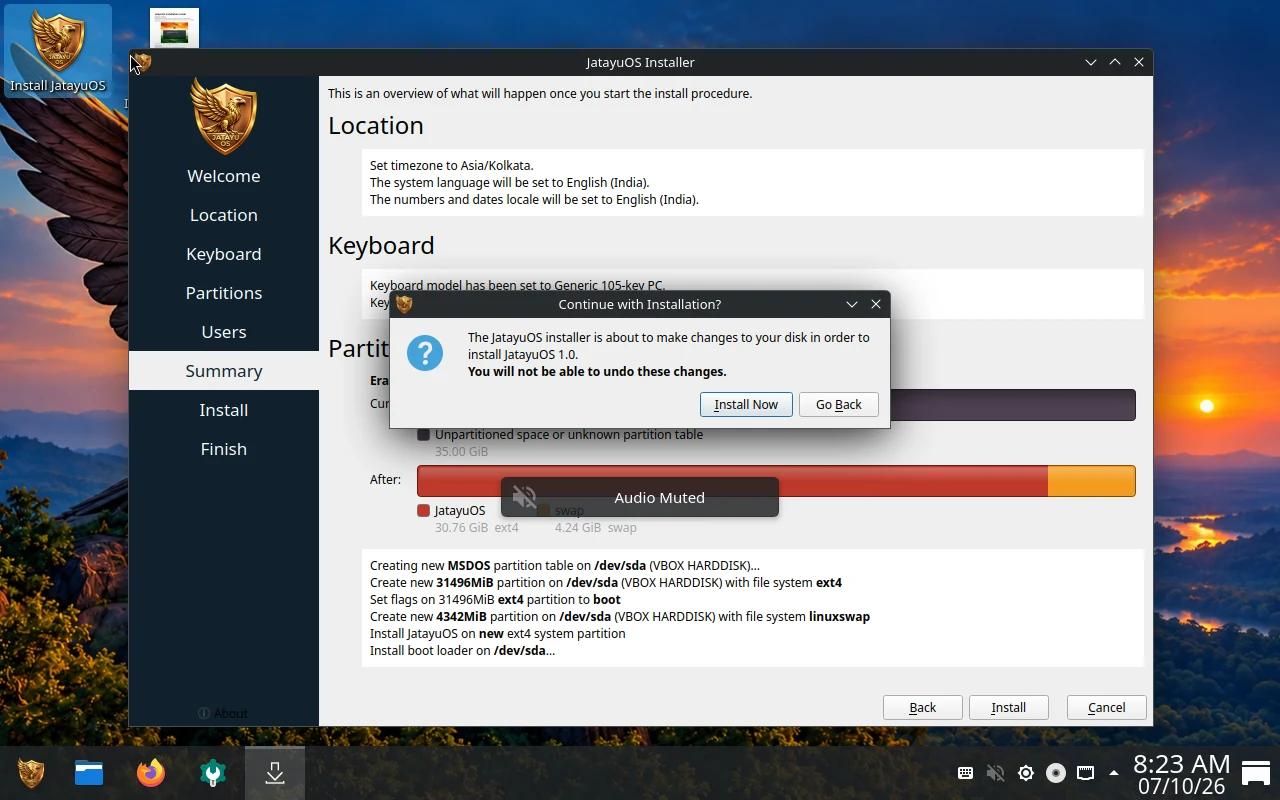
Click Install only after checking the summary. The confirmation dialog is the final checkpoint before disk changes begin. Choose Go Back if unsure, or Install Now to proceed.
10. Wait for installation
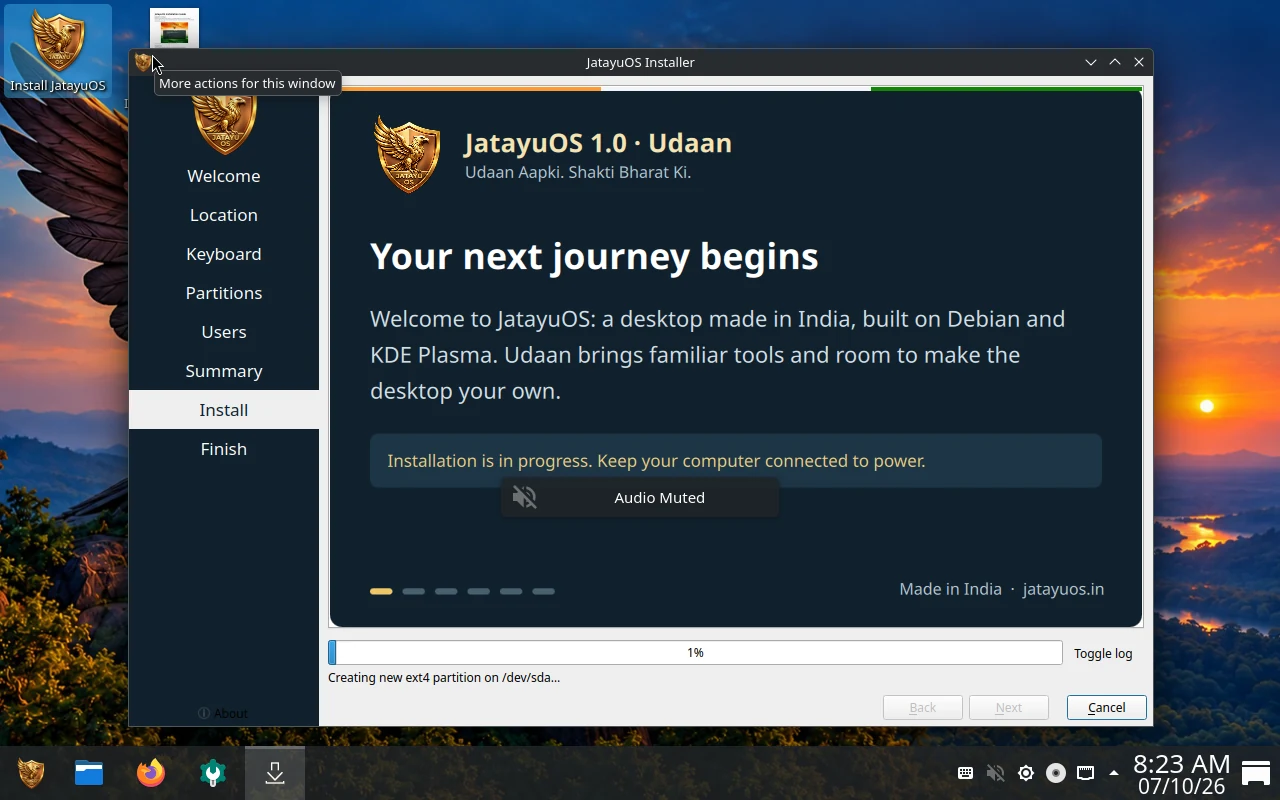
Keep the computer connected to power and leave the USB connected while installation runs. Do not switch off or restart during this step. Wait for the installer to report that installation has finished.
11. Restart into JatayuOS
When the installer reports success, follow its finish/restart instructions. Remove the USB when prompted, or after shutdown before switching the computer back on. Sign in using the account and password you created in step 7.
Check your network connection, then review updates and explore Aarambh. See Your First Steps with JatayuOS and the documentation for help.
Download the PDF Installation Guide
Need help with your disk layout or an installer error? Visit Support before making further disk changes.